
Run your first job from lead to paid
Follow one customer through Homeforce, from a new lead to an estimate, a scheduled job, an invoice and a payment.
This walkthrough takes one customer through the whole cycle. Try it with a real call or with yourself as the customer.
1. Add the lead
- Click New → Lead at the top of any page.
- Fill in the name, phone or email, address and Service type. Pick How did they hear about us? so the lead is credited to the right source.
- To book a visit right away, turn on Schedule appointment now and click Create lead & book. Otherwise click Create lead.
The lead shows on Leads & Pipeline in the New column. Clicking a lead that isn't booked yet opens Book a call, where you pick a real open arrival window. More in Manage leads.
2. Build and send the estimate
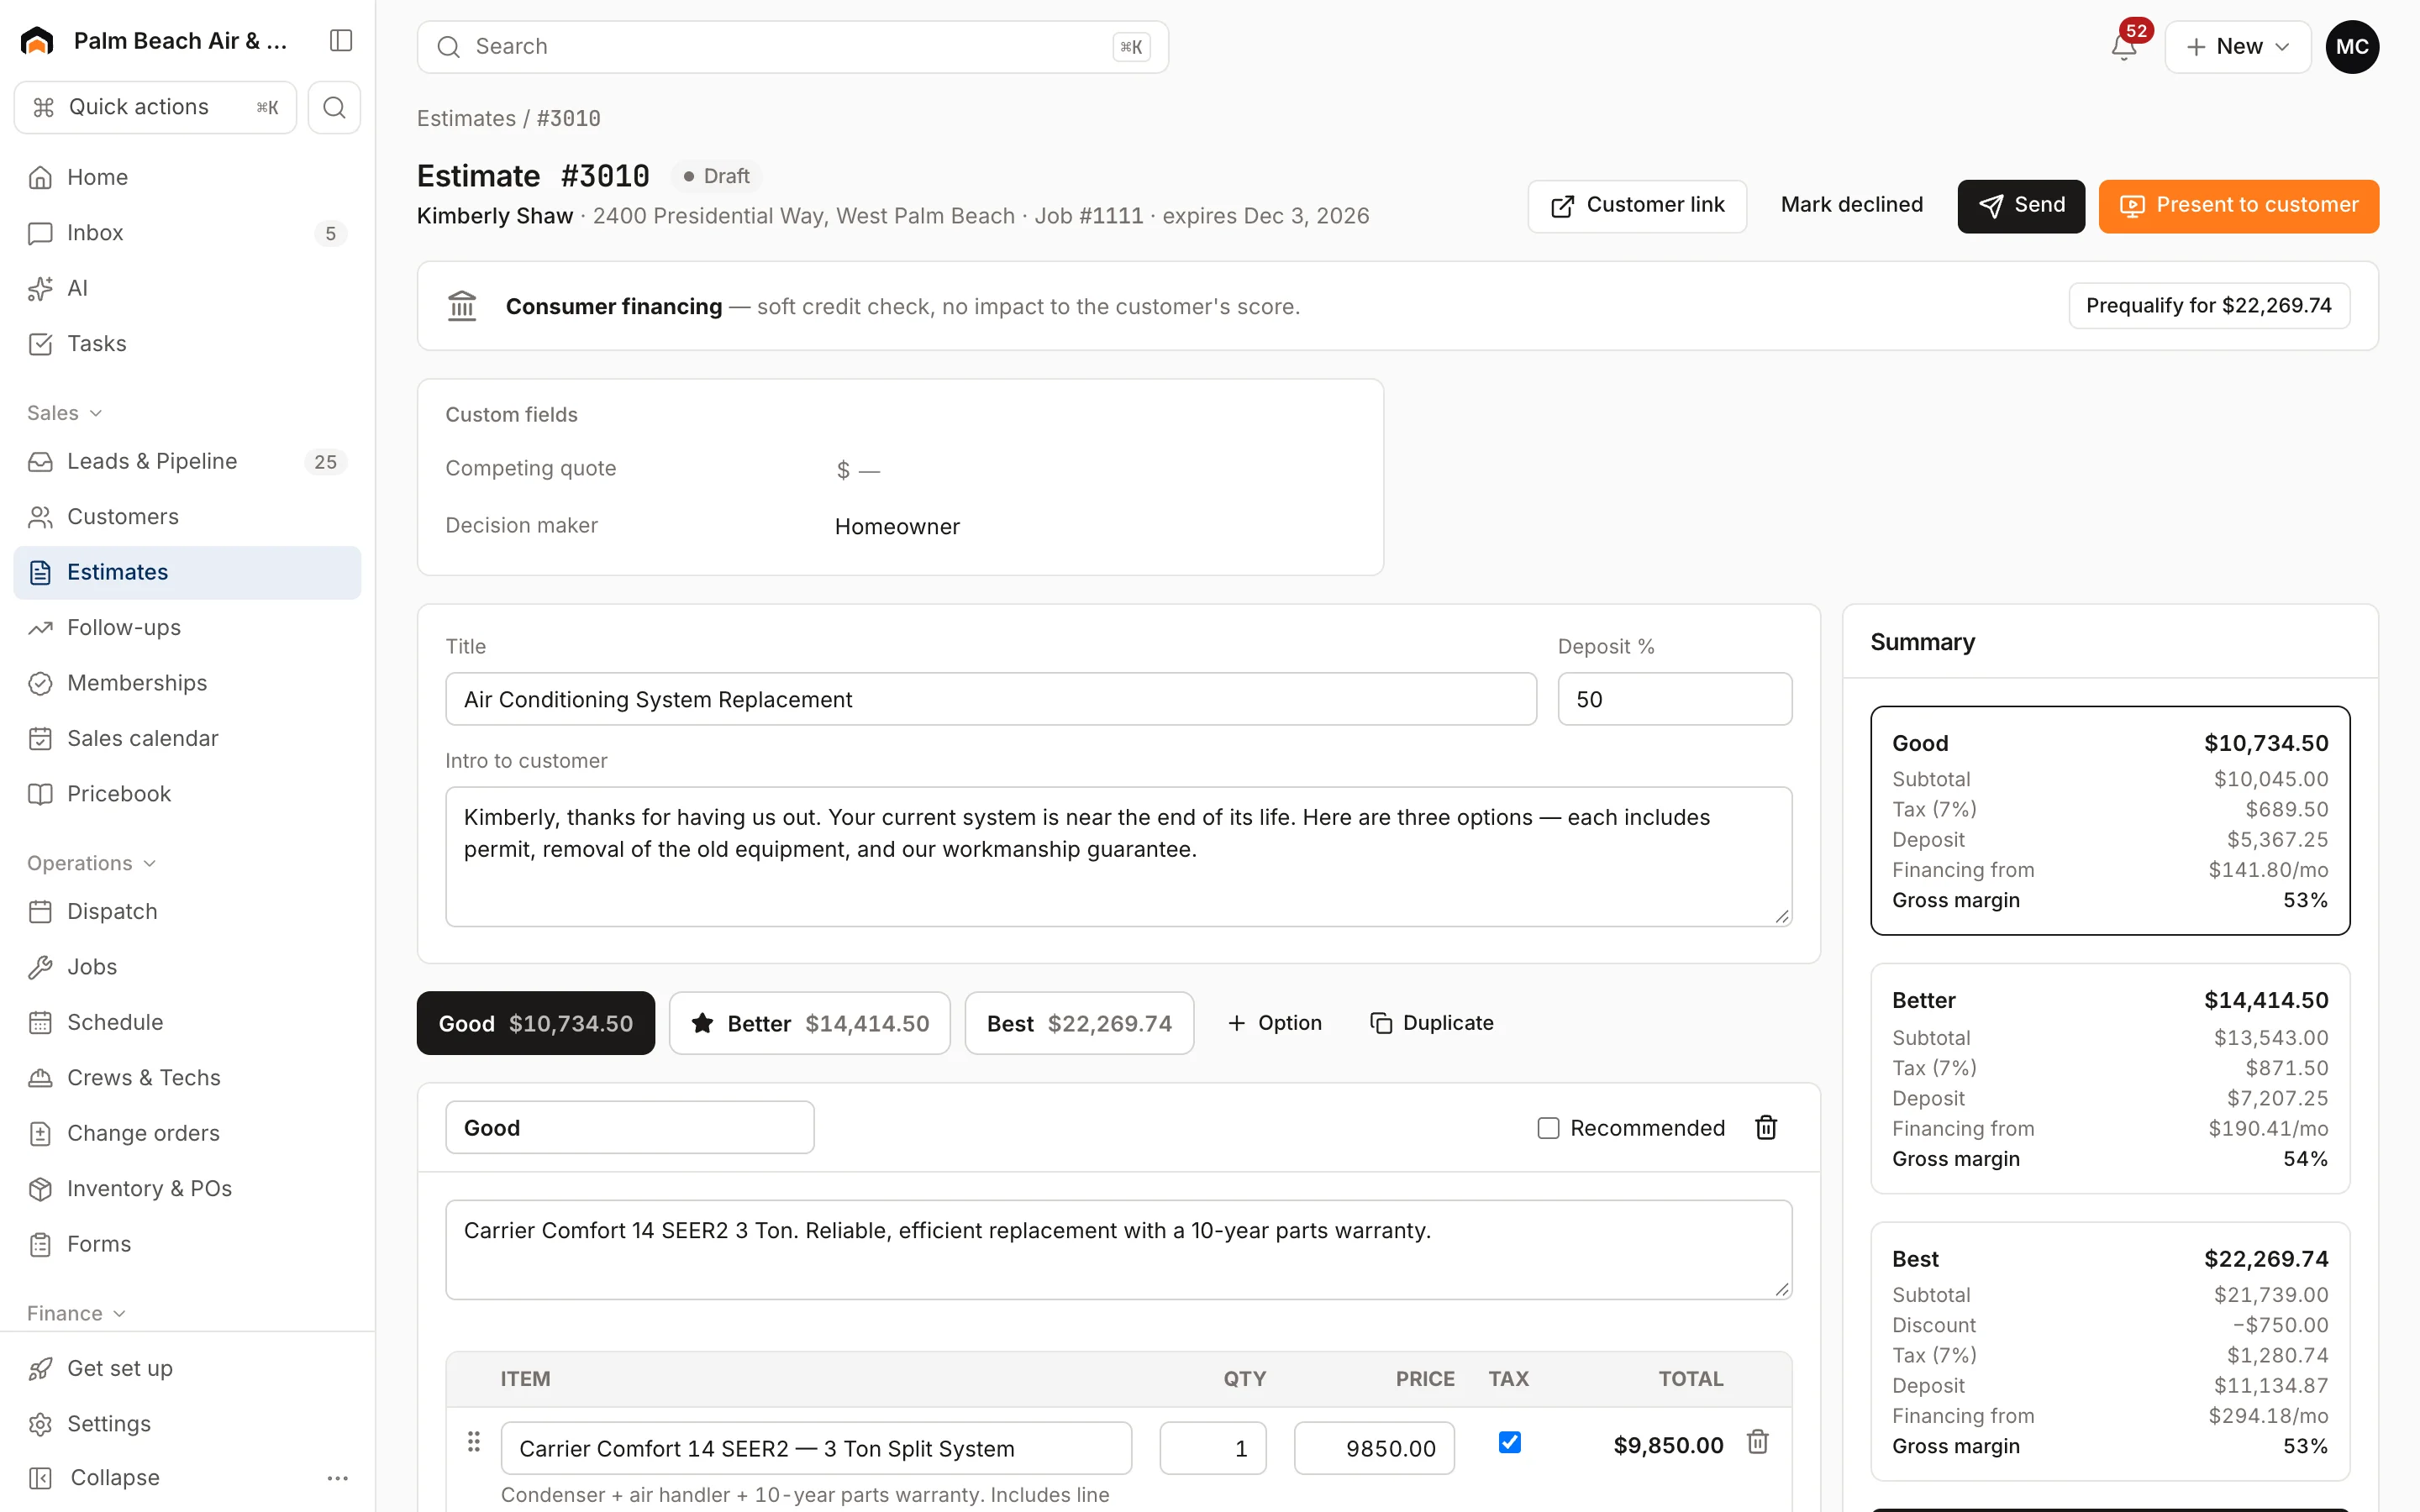
- Open the job (or the customer) and click Estimate, or use New → Estimate.
- Pick the customer, choose a blank estimate or a template, and click Create & open builder.
- Add items from your pricebook. Add good, better and best options if you like.
- Click Send to text and email the customer a link, or Present to customer to walk through it together on a tablet.
The customer picks an option and approves from their link. If you set a deposit, a deposit invoice is created when they approve. See Create an estimate and Collect a deposit.
3. Schedule the work
If you booked the lead, a job already exists. Otherwise click New → Job, pick the customer and Job type, and set the first visit's date and time.
Each trip to the house is a visit. Drag visits onto a tech on Dispatch. See Use the dispatch board. The tech sees the visit in the field app, adds photos and notes, and marks it done.
4. Invoice the customer
- Open the job and click Create invoice (or Create invoice on the approved estimate).
- Check the line items.
- Click Save & send. The customer gets the invoice with a pay link.
See Create and send an invoice.
5. Get paid
The customer can pay online from the link. To take payment yourself, open the invoice, click Collect payment and choose card, bank transfer, tap to pay, cash or check (the options depend on how payments are set up).
When the balance hits zero, the invoice shows as paid and the payment appears under Payments. If review requests are on, the customer is asked for a review. See Reviews.
Was this helpful?
Related articles
Sales
Manage leads
Work every new inquiry on the Leads board, from New to Contacted to Booked, and see where your leads come from.
Sales
Create an estimate
Start an estimate for a customer, add line items from your pricebook, and save it ready to present or send.
Scheduling and dispatch
Use the dispatch board
See every tech's day on one timeline, drag waiting work onto the board, and keep the day on track from the office.
Invoices and payments
Create and send an invoice
Build an invoice from your pricebook, save it as a draft or send it with a pay link by text and email.
Still stuck?
Our team answers support emails during business hours, usually within a few hours.