
Create and send an invoice
Build an invoice from your pricebook, save it as a draft or send it with a pay link by text and email.
An invoice tells the customer what they owe and gives them a secure link to pay. You can create one on its own, from a customer, or from a job.
Owners, admins, salespeople, project managers, accounting and techs can create and send invoices. Office/CSR users can view invoices and collect payments, but can't create them.
Create an invoice
- Go to Invoices and click New invoice. (You can also click Invoice on a customer's record or a job. The customer is filled in for you.)
- Under Customer, search by name, phone, email or address.
- Under Line items, search Add from pricebook for services, parts and equipment, or click Custom line to type your own.
- Adjust the description, quantity and price on each line. Click the trash icon to remove a line.
- Add a PO number if the customer needs one.
- Click Save draft to keep working later, or Save & send to send it now.
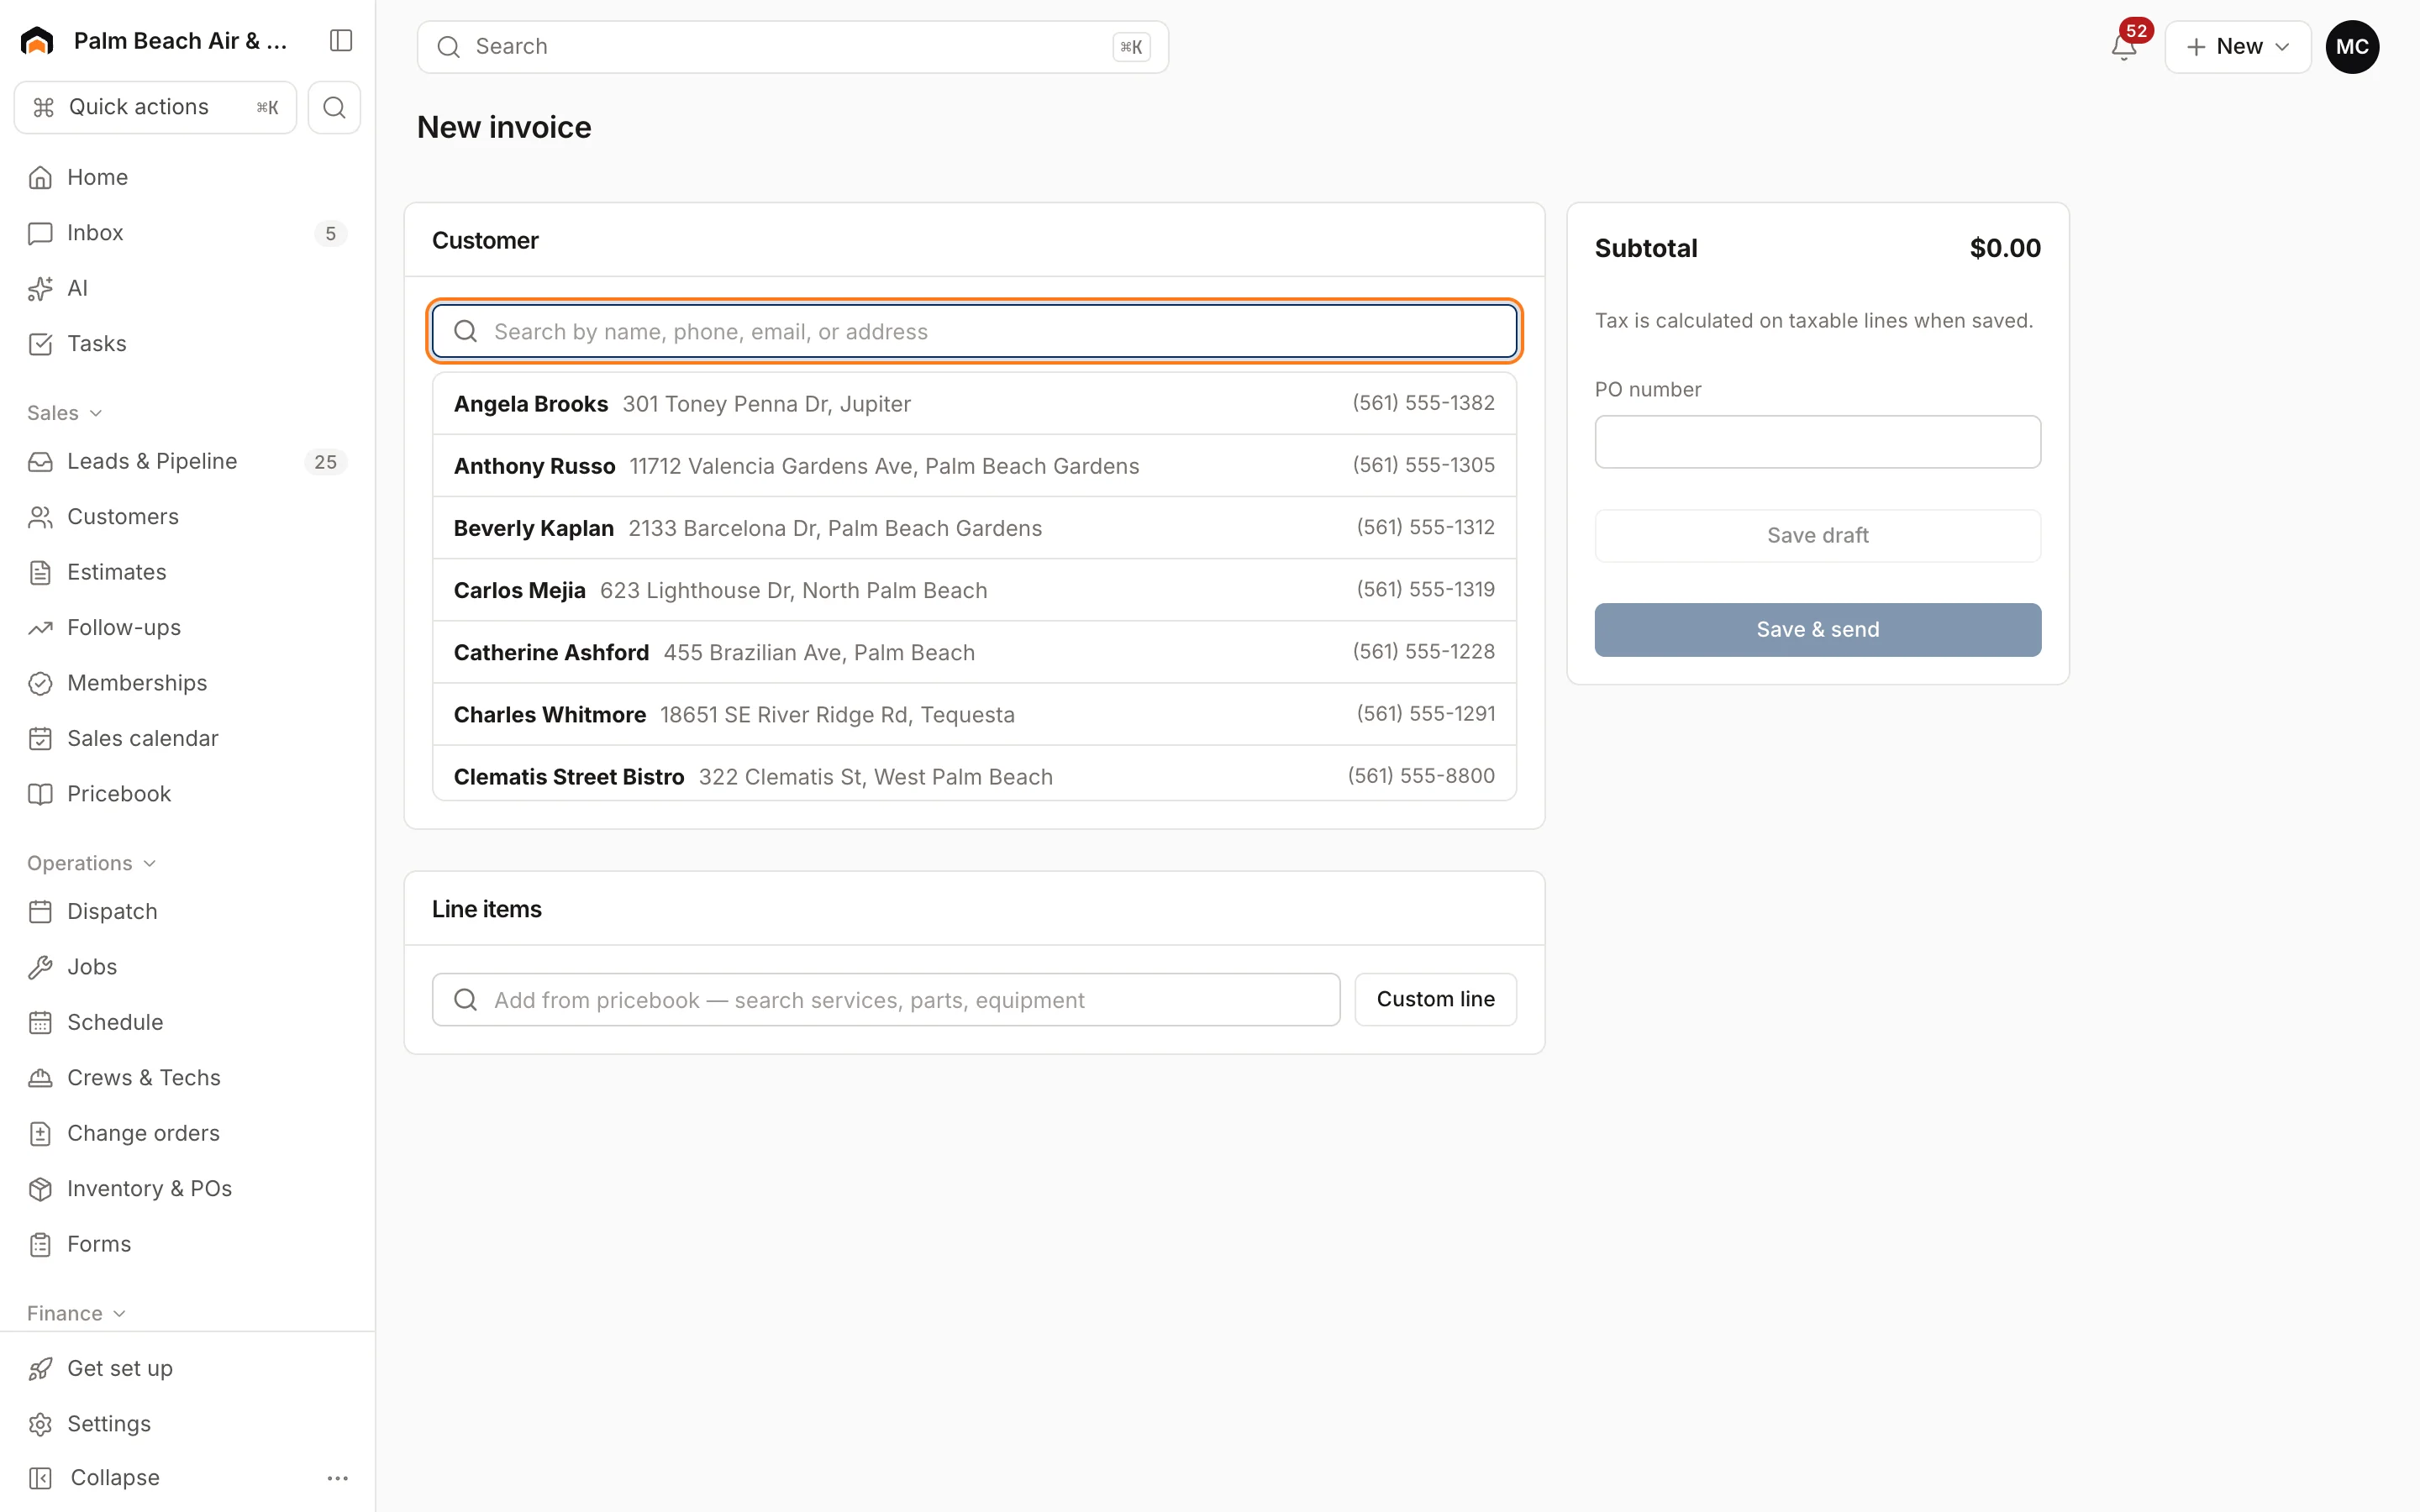
The subtotal updates as you go. Tax is added on taxable lines when you save, using your rate from Settings → Invoices & taxes. If the customer is a member, pricebook items come in at member prices. See Give members special pricing.
Send an invoice
On a draft invoice, click Send. On an invoice you've already sent, the button says Resend.
When you send, the customer gets a text and an email with the invoice number, amount and a pay link. The invoice moves from Draft to Sent.
A $0 invoice (for example, a visit included in a membership) is marked Paid as soon as you send it, and no pay link goes out.
The invoice page
The invoice page shows the invoice as the customer sees it: your company details, the bill-to address, lines, totals, any deposit applied, and the balance due. On the right, Payments lists every payment, refund and processing fee.
Buttons at the top:
- Pay link: opens the customer's payment page in a new tab.
- Print: prints the invoice or saves it as a PDF.
- Send / Resend
- Void
- Collect payment: take a payment now. See Collect a payment.
If QuickBooks is connected, the line under the invoice title shows whether it synced.
Invoice statuses
| Status | Meaning |
|---|---|
| Draft | Saved, not sent yet |
| Sent | Sent and unpaid |
| Partial | Some of the balance is paid |
| Paid | Paid in full |
| Past due | Sent or partial, and past its due date |
| Refunded | Every payment on it was refunded |
| Void | Canceled |
Find invoices
The Invoices page has tabs for Unpaid, Past due, Drafts, Paid and All. Cards at the top show what's Outstanding, what's Past due, and how much Retainage held is on open project invoices.
Was this helpful?
Related articles
Invoices and payments
Invoice a job or an approved estimate
Bill a finished job, or turn an approved estimate into the final invoice with any deposit already credited.
Invoices and payments
Collect a payment
Take card, card-on-file, card reader, bank, cash or check payments on an invoice, including partial payments.
Invoices and payments
Get paid with pay links
What a pay link is, what your customer sees when they open it, and how to share one.
Invoices and payments
Set up online payments and invoice defaults
Connect Stripe so customers can pay by card or bank, and set your sales tax, due dates and invoice terms.
Still stuck?
Our team answers support emails during business hours, usually within a few hours.