
Job statuses and closing out a job
What each job status means, which ones change on their own, how to use the Jobs board, and how to finish and bill a job.
A job's status tells everyone where it stands. Most of the time Homeforce sets it for you from the job's visits. A few statuses are yours to set.
The statuses
| Status | Set by | Meaning |
|---|---|---|
| Unscheduled | Automatic | No visit has a time yet. |
| Scheduled | Automatic | At least one visit is booked. |
| In Progress | Automatic | A tech is on the way or on site, or some visits are done and some aren't. |
| Completed | Automatic, or you | Every visit is done. |
| On Hold | You | Paused, for example waiting on parts or a permit. |
| Invoiced | You | Billed. |
| Closed | You | Finished and paid; nothing left to do. |
| Canceled | You | Not going ahead. |
The automatic statuses follow the visits. See Visit statuses. Once you set On Hold, Invoiced, Closed or Canceled, the status stays put until you change it, even when visits change.
Change a status
- On the job, click the Status in the Details panel and pick a new one.
- On the Jobs board, drag the card to another column.
If you set an automatic status by hand (say, Completed while a visit is still open), it will update again the next time one of the job's visits changes.
The Jobs board
Jobs in the sidebar (Jobs & Projects or Projects, depending on your company) opens a board with a column for Unscheduled, Scheduled, In progress, On hold, Completed and Invoiced.
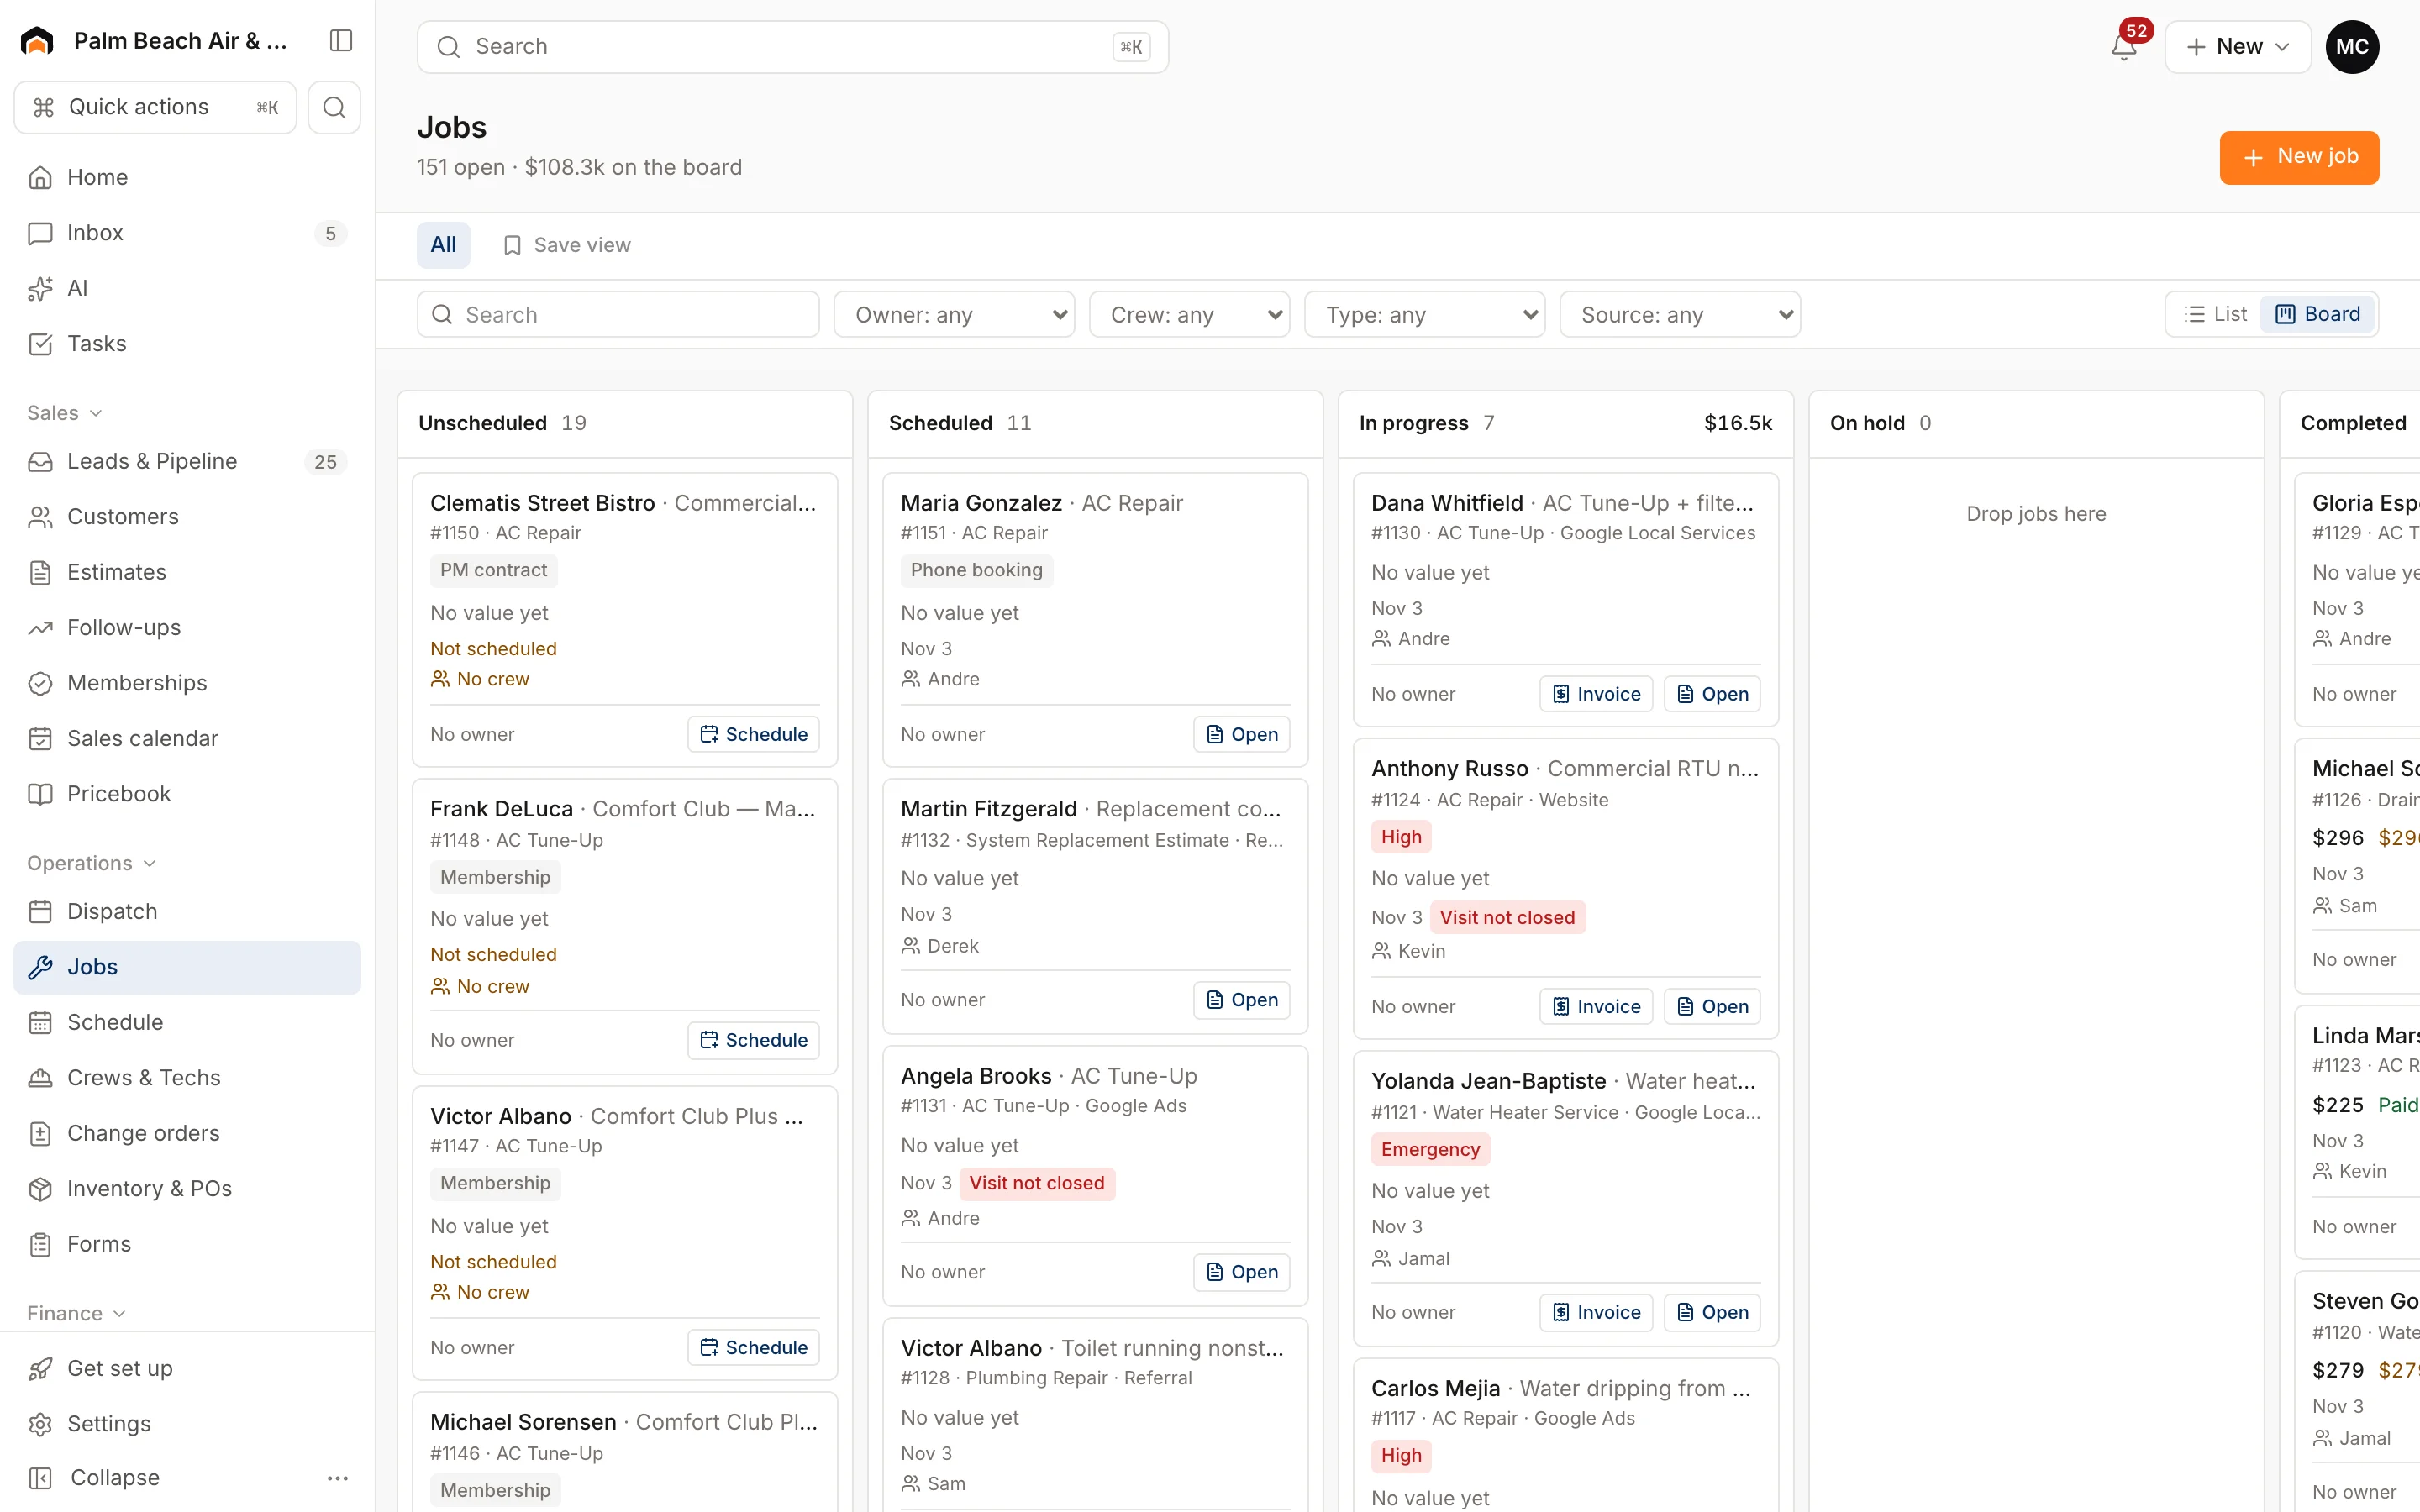
Each card shows the customer, summary, job type, value, amount due, crew or techs, and warning badges like an overdue invoice or a job past its target date. Use the buttons on the card to Schedule, Invoice or Open it. Filter by Owner, Crew, Type and Source, and save the filters as a view.
Switch to List for a table with Open, Unscheduled, Completed and All tabs. Closed and canceled jobs only appear under All in the list.
Close out a job
- Make sure every visit is completed. The tech taps Complete visit in the field app, or the office clicks Mark completed on the dispatch board.
- The job moves to Completed and the main button on the job becomes Create invoice.
- Create and send the invoice. See Create and send an invoice.
- Set the status to Invoiced, and to Closed once it's paid.
Was this helpful?
Related articles
Scheduling and dispatch
Visit statuses
What Unscheduled, Scheduled, En Route, On Site and Completed mean, who moves a visit along, and how it changes the job's status.
Jobs and projects
Find your way around a job
What's on the job page - the header actions, money and summary panels, job details, and the Activity, Visits, Estimates, Invoices, Costs and Files tabs.
Invoices and payments
Create and send an invoice
Build an invoice from your pricebook, save it as a draft or send it with a pay link by text and email.
Reports
Reports overview
See revenue, invoicing, average ticket, close rate, team performance and lead source ROI for any recent period.
Still stuck?
Our team answers support emails during business hours, usually within a few hours.