
Set up your pricebook
Add services, materials and equipment with flat-rate, markup and member prices, or import them from a spreadsheet.
Your pricebook is the list of everything you sell. Estimates, invoices and the field app all pull prices from it, so set it up once and everyone quotes the same price.
Everyone except subcontractors can see prices. Only owners and admins can add or change items. Costs and margins are visible only to owners, admins, project managers and accounting.
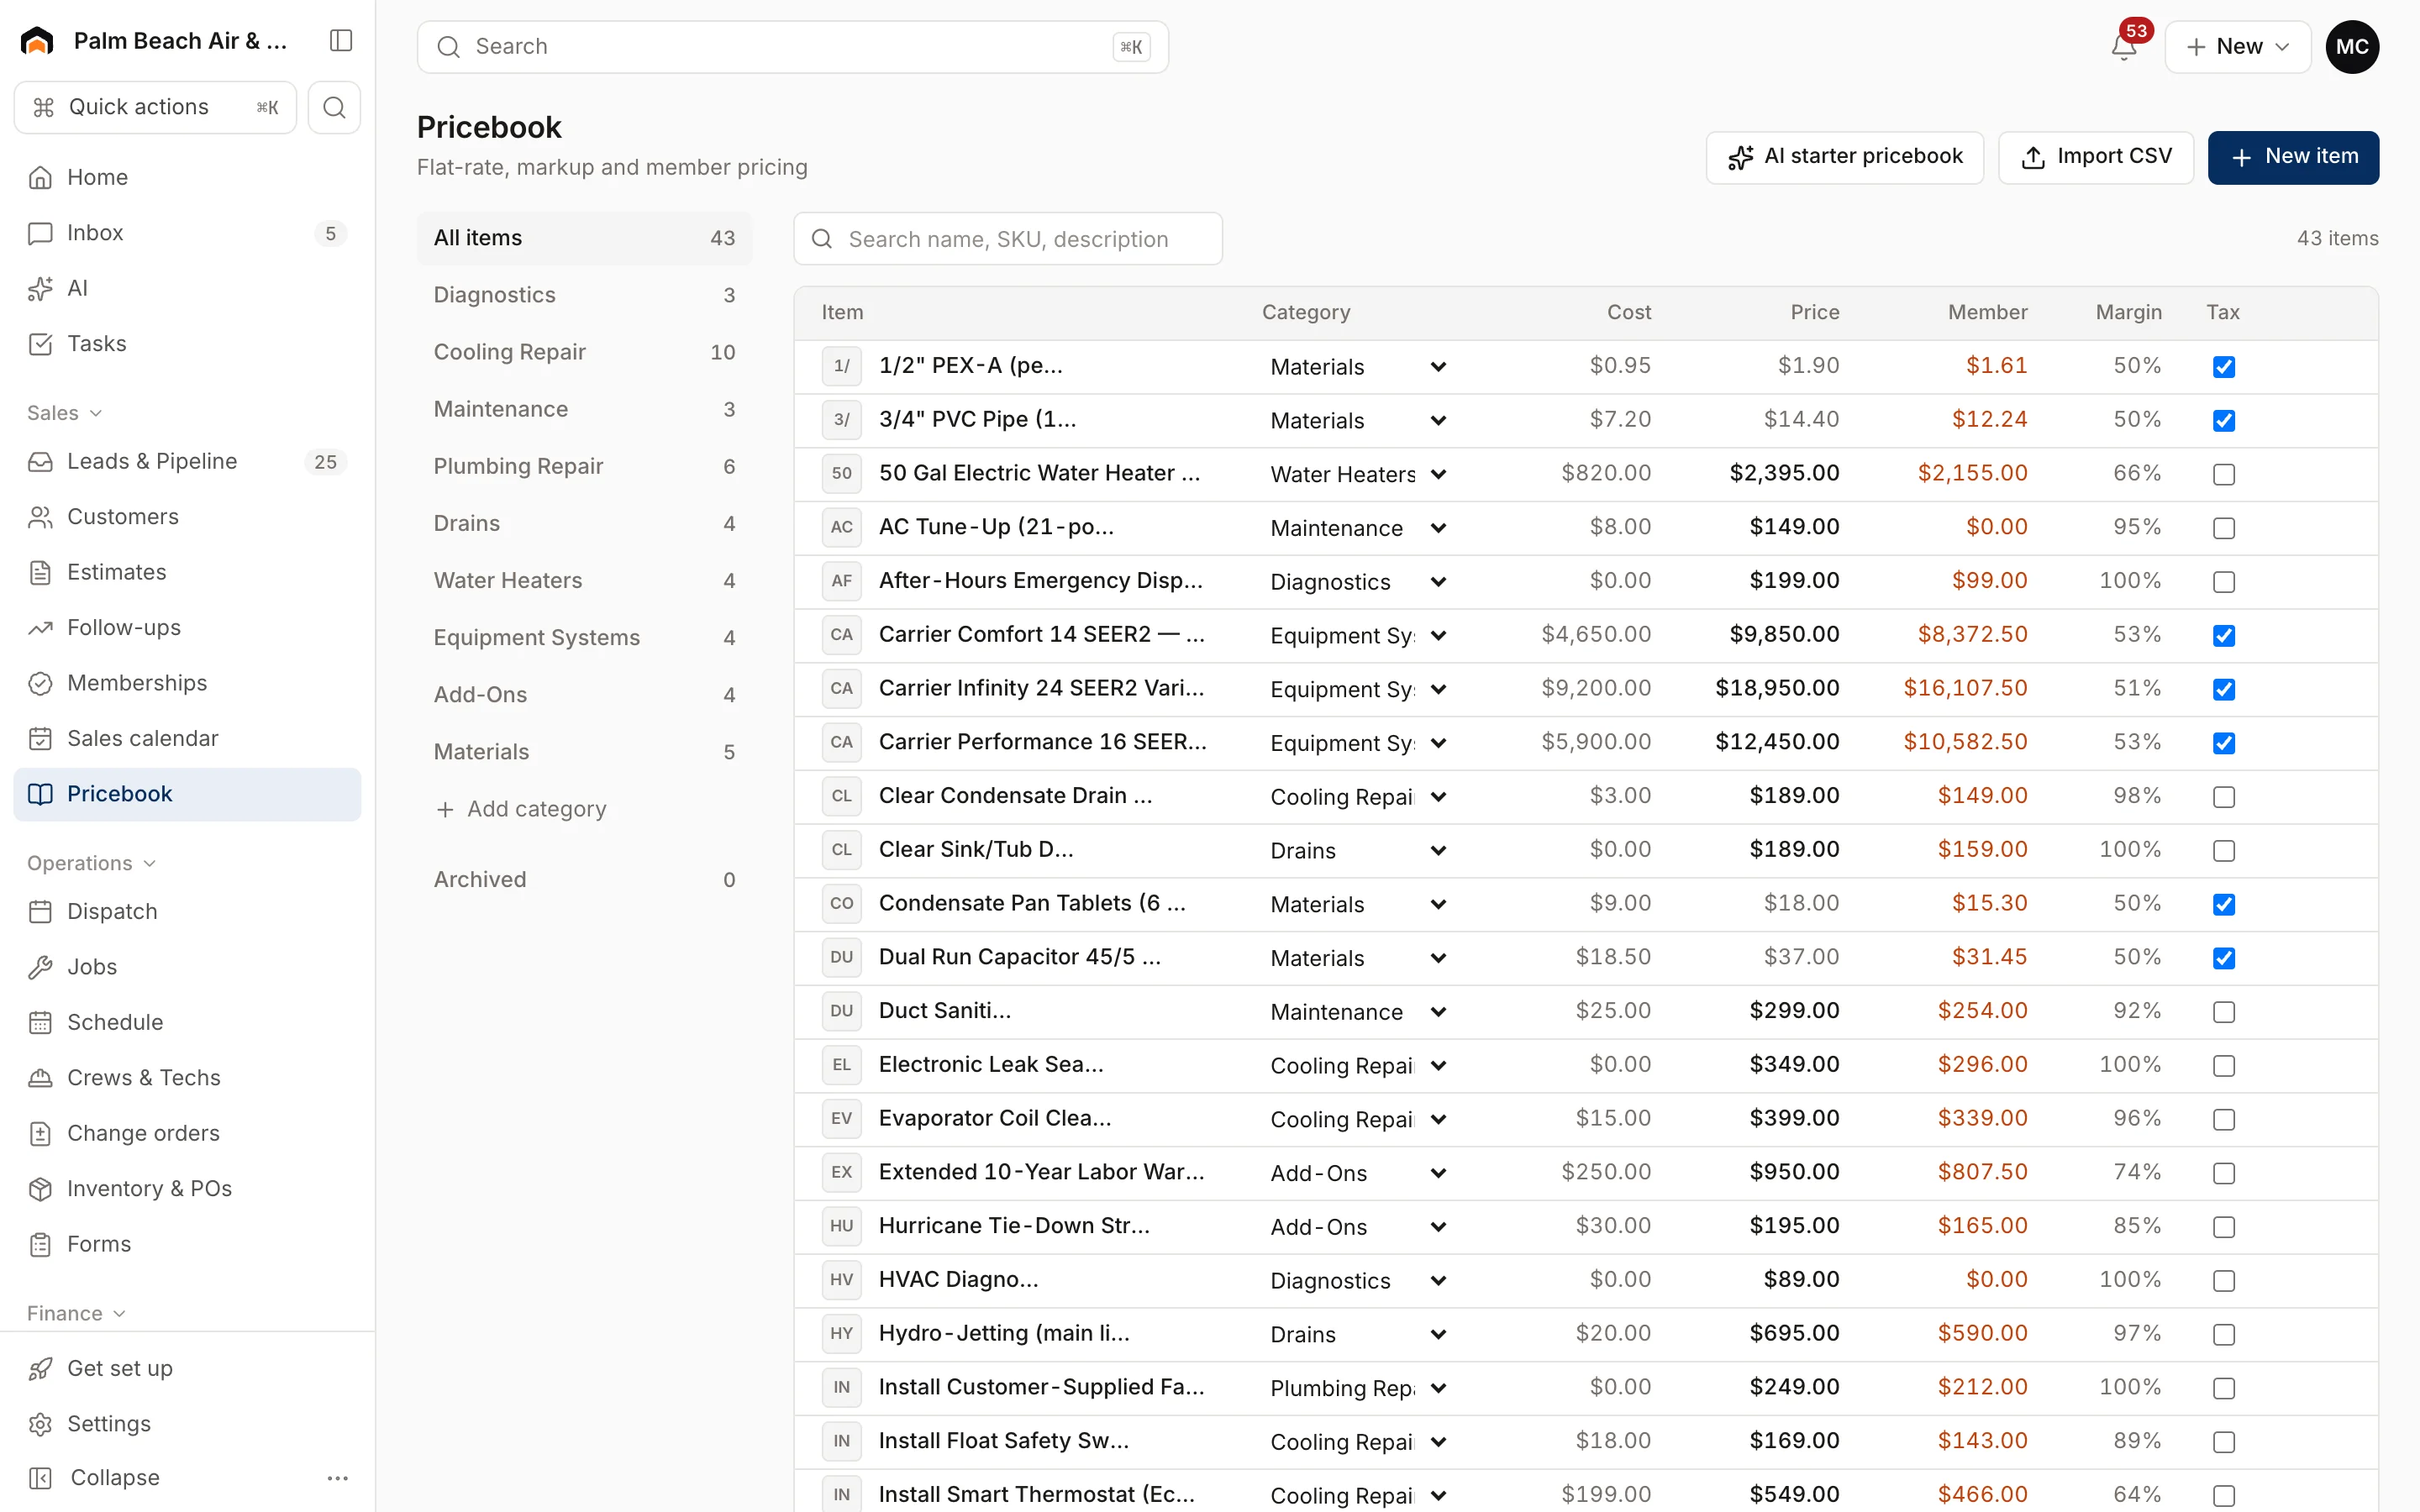
Three ways to fill it
- New item: add items one at a time.
- Import CSV: bring in a price list from a spreadsheet or your old software.
- AI starter pricebook: pick your trades, click Suggest items, review the suggested flat rates, and keep what fits. Items you already have are never duplicated.
Add an item
- Click New item.
- Under Item, enter the Name, choose the Type (Service (flat rate), Material or Equipment), pick a Category, and write a Customer-facing description.
- Under Pricing, enter the Cost, a Markup %, the Flat-rate price, a Member price, the Unit (each, sq ft, ton and so on), and whether it's Taxable.
- Under Details, add a SKU and an optional Photo.
- Click Add item.
How prices are worked out
- If an item has a Flat-rate price, that's the price.
- If not, the price is the cost plus the item's Markup %. With no markup of its own, the default markup for that type from Settings → Pricebook is used.
- Members pay the item's Member price. If that's blank, they get your Member discount % from Settings → Pricebook.
Edit and organize
- Click a name or price in the list to change it in place. Tick or untick Tax right in the row.
- Use the category list on the left to filter. Click Add category to make a new one.
- Use an item's menu to Edit, Archive or Delete it. Archived items stay on past estimates and invoices but can't be added to new ones. Find them under Archived and use Restore to bring one back.
- Search by name, SKU or description.
Import from a CSV
- Click Import CSV.
- Click Download template (or Load template) to see the columns: Type, SKU, Name, Description, Category, Unit, Cost, Price, Member Price, Markup %, Taxable, Hours.
- Choose your CSV file, or paste the rows into the box.
- Click Validate & preview. Check the preview and any rows that need attention. Those rows will be skipped.
- Click Import … items.
Each row needs a name and either a price or a cost with a markup. Type can be service, material or equipment (labor, part and system work too). Re-importing updates items with a matching SKU instead of making duplicates.
Was this helpful?
Related articles
Sales
Create an estimate
Start an estimate for a customer, add line items from your pricebook, and save it ready to present or send.
Recurring
Set up membership plans
Create maintenance plans and service agreements with recurring billing, included visits and member pricing.
Getting started
Set up your company
Answer five quick setup questions, then work through First steps and the Get set up checklist.
Integrations
QuickBooks Online
The status of the QuickBooks Online integration, what it will sync and which way, and how mappings and sync rules work.
Still stuck?
Our team answers support emails during business hours, usually within a few hours.