
Contract terms and forms
Write the terms customers accept on estimates and invoices, your warranty, and build checklists techs fill out in the field.
Two settings pages handle paperwork: Contract terms & documents for the fine print customers see, and Forms & checklists for what techs fill out on the job. Owners and admins can change them.
Contract terms & documents
Go to Settings → Contract terms & documents. Each section has its own Save button, and each box holds up to 8,000 characters.
- Estimate terms: your Terms and conditions. New estimates start with this text. Customers accept the terms when they approve.
- Invoice terms: Payment terms (for example, "Payment due on receipt") and an Invoice footer, a short line like a thank-you or license number. Both appear on the invoice and the customer's pay page.
- Warranty: your standard Workmanship warranty. Pricebook items can add their own warranty on top.
Forms & checklists
Go to Settings → Forms & checklists. Forms are filled out in the field app on the job types you choose, such as inspections, safety checks or sign-offs.
Build a form
- Click New form.
- Give it a name.
- Click Add field for each question, and pick a type: Checkbox, Pass / Fail, Number, Text or Photo. Number fields can have a unit, like "psi".
- Check Required for answers techs can't skip.
- Use the arrows to reorder fields, or the trash icon to remove one.
- Under Use on job types, check the job types this form belongs to.
- Click Save form.
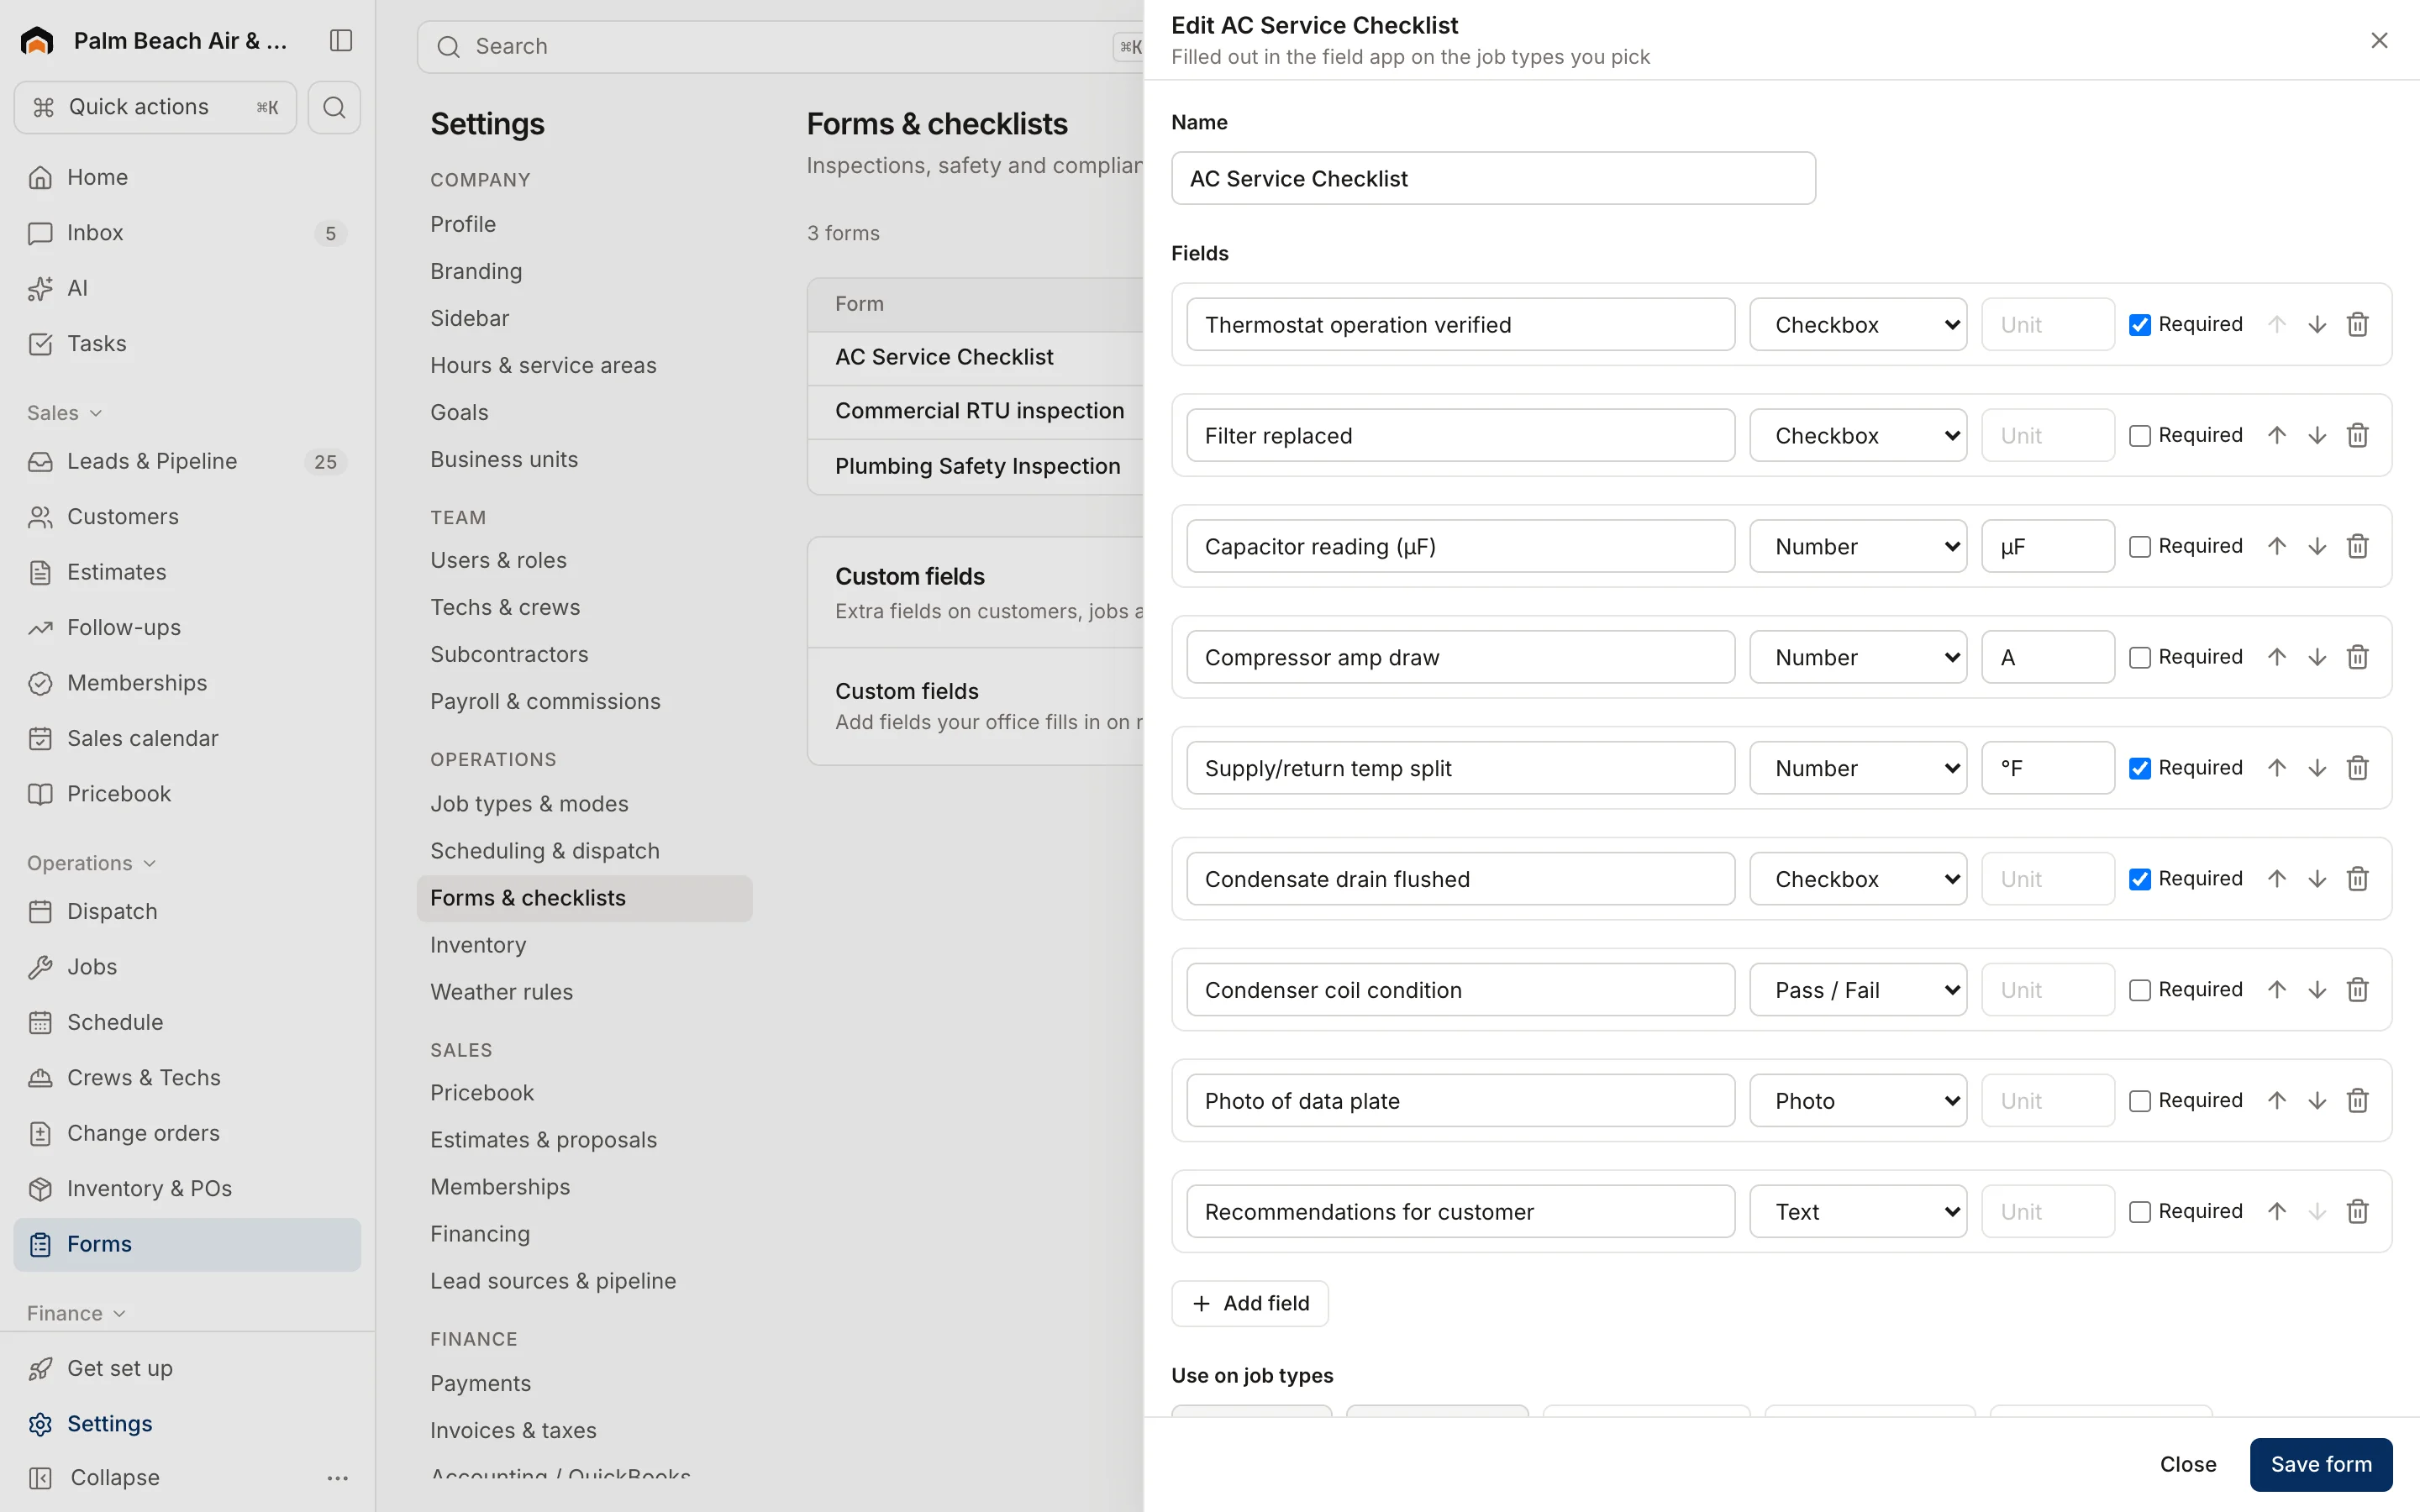
The list shows each form's number of fields, how many are required, and which job types use it. Click a form to edit it.
Was this helpful?
Related articles
Settings
Estimate and pricebook settings
Set estimate expiry, default deposits, good/better/best, follow-up sequences, pricebook markups and member discounts.
Settings
Job types and work modes
Set the kinds of work you do and create job types that control how each kind of work runs, books and shows on the board.
Custom fields and layouts
Add custom fields
Track your own details, like gate codes, permit numbers or roof type, on customers, leads, jobs, estimates, properties and equipment.
Mobile app
Get the mobile app and sign in
Install the Homeforce app on your iPhone or Android phone, accept your team invite, and sign in with a code, password or Google.
Still stuck?
Our team answers support emails during business hours, usually within a few hours.